Yesterday I released the beta on a new plugin, Genesis Simple Aweber Form, and included some recommended CSS for the Generate Box used in the Generate Genesis Child theme. I mentioned that I would be working up some recommended CSS for other themes.
I tested this in the Decor Genesis Child Theme and it works well out of the box, so I don’t have any recommended CSS for that theme, so I’d like to share the code I worked up for my current favorite Genesis child theme. If you’ve been following along, or even recognize the theme I’m using here, you will know that is Streamline.
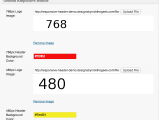
As you know, the Streamline theme has two opt-in box locations. The Genesis Simple Aweber Form plugin does most of the work, but things won’t quite line up because of how unique the code is and because it uses a name and email field. I recommend adding this code to the style sheet at the bottom of the eNews and Update Widget section.
.newsletter .aweber .name {
	width: 100px;
}

#sidebar .aweber .email,
#sidebar .aweber .name {
	display: block;
	margin: 5px 0;
	width: 100%;
}

#sidebar .aweber #subbox {
  display: block;
  float: left;
  width: 139px;
}

#sidebar .aweber #subbutton {
  margin: 23px auto;
  padding: 10px 15px;
  text-shadow: 1px 1px #FFFFFF;
  text-transform: uppercase;
}
That will make the forms line up just like this:


 Genesis Responsive Header Updated
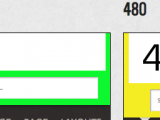 Genesis Responsive Header
 How I Make Custom Fields Easier in Genesis
 How I Added Custom Fields to the Genesis Responsive Slider
 A Better Home Page
Hi Nick,
Thank you very much for creating this plugin. On the horizontal form, is there a way to remove the name field and have the email field extend to take its place?
Thanks,
Greg
Greg, in the next update I’m planning on making it so the name field can be disabled. Since this is in beta I’m still looking for feedback on what is working and what should be changed.
Thank you for the reply Nick. I am no programmer, but I deleted some things in the plugin files that appeared to be related to the name field, ran a test and it’s working. I sincerely appreciate your generosity in creating this.
Editing plugin files is dangerous. When it updates you lose those edits. Just check when an update comes out that you change your widget settings to work right.
Hi,
Thank you for the great plugin.
Is there anyway to get the submit button to appear below the name and address field and make it wider?
Thank you
Aaron, you can do all kinds of things via CSS. I have posted the recommended CSS for a few themes. Using Firebug or a similar tool will really help you in identifying what you want to change and lets you play with the values live before copying them to your style sheet.
This plugin rocks! Except I’m having two issues with it.
Before finding this plugin, I created a widget area in my header to add the aweber java code and added css code to force it to be horizontal. The problem with that is it isn’t responsive.
Right now I have your simple aweber form inserted below my aweber java code in a text box. If I remove my text box with the aweber java code, my header’s image loses its location. It looks like it’s gone until I squeeze down my browser. Once the browser gets small enough, you can see the header image is actually way up above everything.
The other problem I’m having is the opt-in isn’t working. It tells me the list isn’t active, but all my other opt-in boxes work just fine.
I’m using Focus Child Theme if that matters.
Thanks for your help! I’d love to see the plugin make it out of beta.
Aha! I fixed my own problem. I moved the new widget area to the after header hook and now the header image stays put.
I saw on the other thread about using just the ID code for the aweber form. I think you mean just its 10 digit code, right? That’s what I have in there, but it’s not working.
Thanks again!
Hey Nick,
I figured the ID field. I thought I had to create an aweber form and use the numbered code for that form. Instead, it’s the name of the list. Silly me.
The only other thing I noticed is, when I tried using a custom “almost done” page, my url got spit out in the middle of an aweber url.
I did a temporary fix by putting my url right in the plug in code where I saw that other url and now it works. I saved the original file to my hard drive just in case. 😉
I hope you’re still working on bringing this plugin out of beta.
Thanks again!
Where i put my aweber script ?
please reply fast…